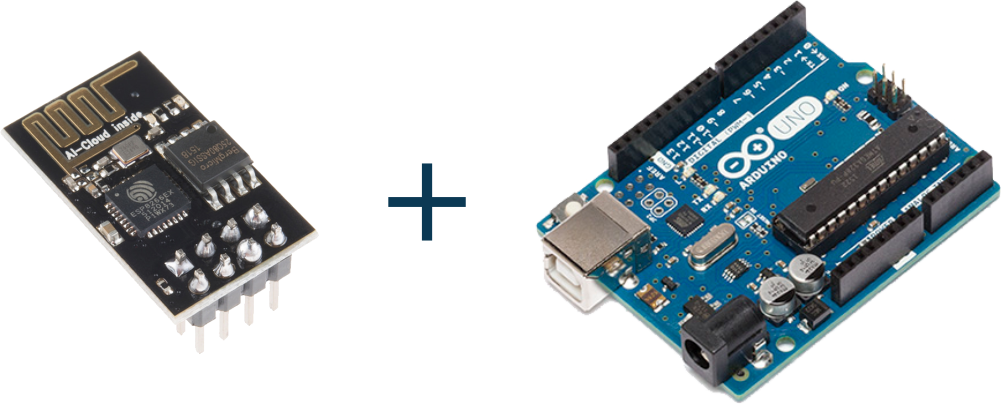
Here, learn how to Program ESP8266 with Arduino Board. You just need to install the ESP8266 board and make the circuit as per the below-given instructions. Learn the basics and features of ESP8266. We are using the Blink LED program as a sample program.
Step 1: Required Components
ESP8266 Module x 1
Arduino UNO Board x 1
3.3V Linear Voltage Regulator (LD1117) x 1
Breadboard x 1
Jumper Wires
Generic LED (for Blink LED Program)
Step 2: Installing Board to Arduino IDE
First, install ESP8266 to Arduino IDE. If you have already installed the board to boards manager of Arduino IDE, skip this step else follow the steps
- Start the Arduino IDE
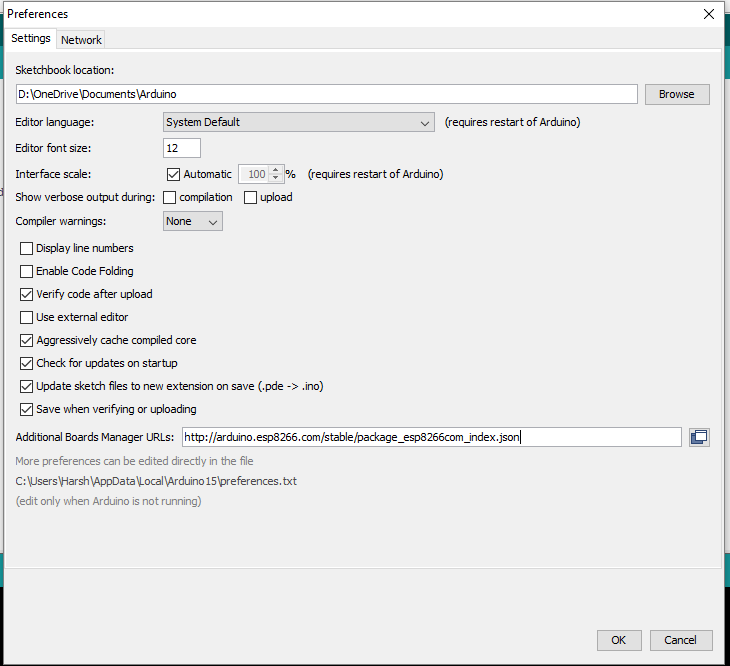
- Go to File > Preferences
- Add the below-given link to Additional Boards Manager URLs
- Go to Tools > Boards > Boards Manager…
- Search ESP8266
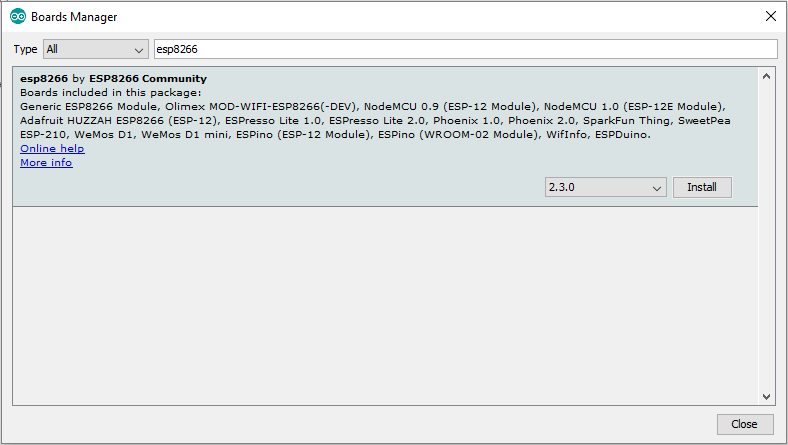
- Click the Install button to install the ESP8266 Board
- Now close the Boards Manager window and select the Generic ESP8266 Module from the board selection list
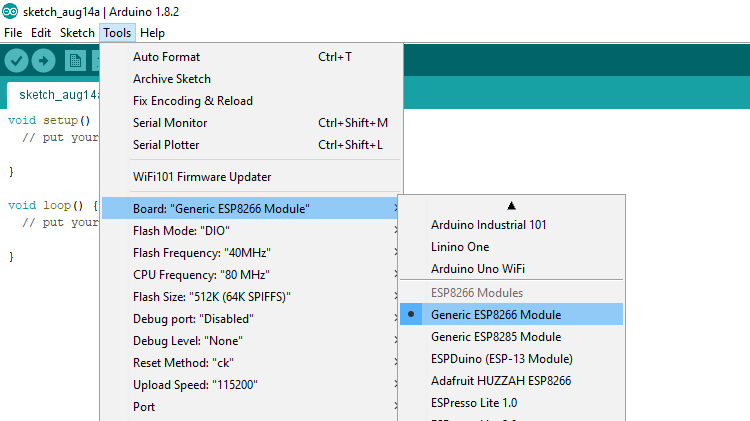
- The installation of ESP8266 in Arduino IDE is done.
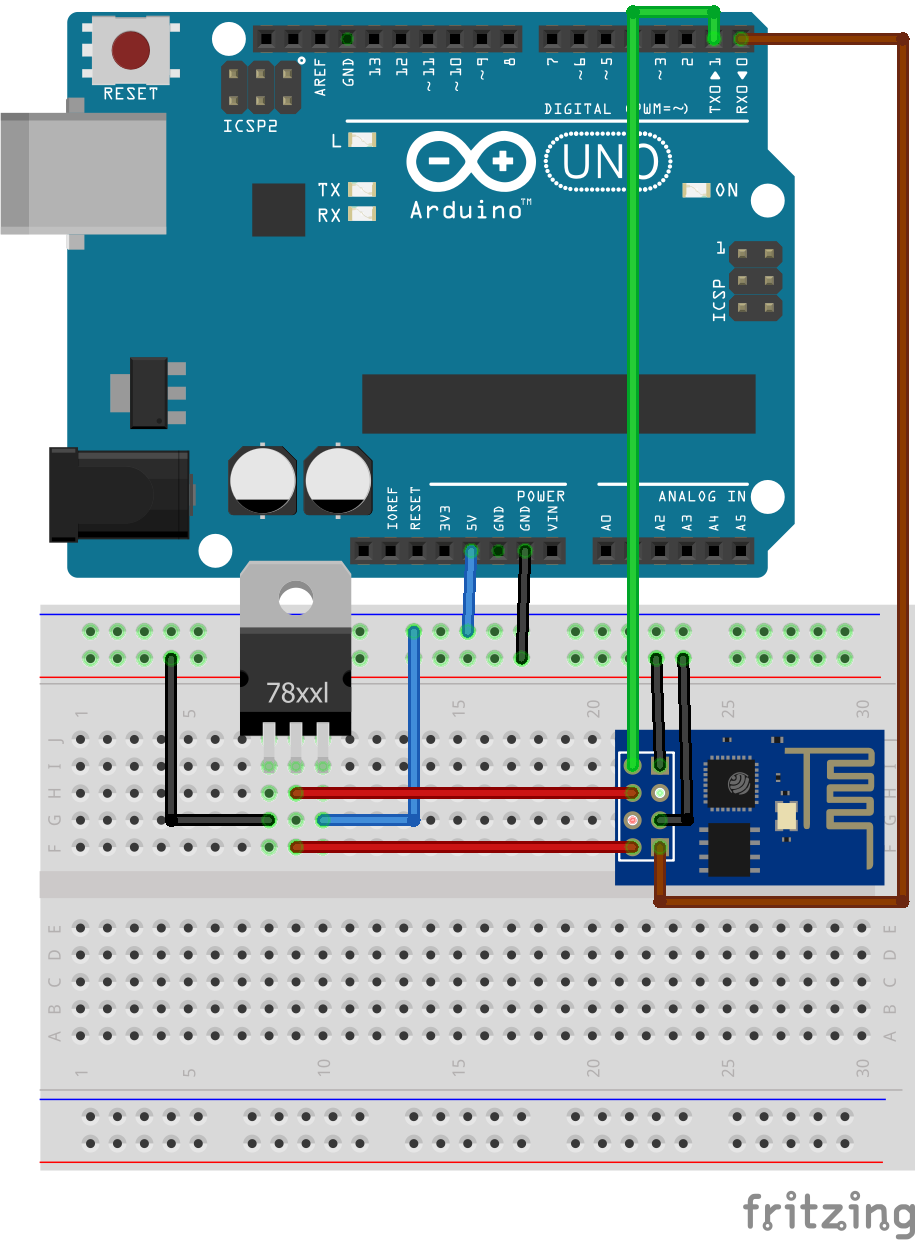
Step 3: Circuit Time
Make a circuit as per the given diagram. Connect the CH_PD and VCC line to Voltage Regulator Output, GND and GPIO_0 to Ground. Also, connect the RX and TX lines of both. GPIO_0 is Grounded to enable the programming mode of ESP8266.
Step 4: Program ESP8266 using Arduino
Make the circuit as per the above-given diagram. Power up the Arduino UNO board and wait till the Arduino Board boots up successful. (It will take around 5 seconds) Connect the Arduino Reset pin to Ground. The reset pin is grounded to bypass the Arduino. It will disable the Arduino Board and upload code directly to the ESP8266. Sample program for Blink LED is as below
After the Arduino IDE shows done uploading of Blink LED program, you can connect the LED to GPIO_2 Pin of ESP8266. Please do not connect the LED before or at the time of uploading the program, it can cause some issues in uploading the program.
Note: Disconnect the power supply for one minute if it will show error in uploading the program to ESP8266.
which port did u choose?
Port which the Arduino Board is connected showing.
why you use 5v pin.? if i use 3.3v pin, what will happen.?
Arduino 3.3V pin supplies low current while ESP8266 requires more current. So, Voltage regulator is required.
do you require to keep RESET to HIGH on esp8266 01 to flash a program on it? i saw on some sites about making a switch configuration for reset. Shed some light please?
also i have an AJAX script that automatically refreshes data on html page. i wish to use it to send sensor data from arduino to esp01 to be displayed on a webpage with periodic refreshing. is it possible to run two set of codes: one (SENSOR READING) on UNO, and other (AJAX&HTML) on esp01?
In my case it is showing error message
warning: espcomm_sync failed
error: espcomm_open failed
error: espcomm_upload_mem failed
error: espcomm_upload_mem failed
But is it right that esp8266 require 3.3v suppy ?
i’m getting error “Timed out waiting for packet header”
esp tool manager ur version >>> 2.5 version.
I have detailed my issue here